A Complete Guide to Creating Your Own Private Dropbox-like Server
November 12th, 2013
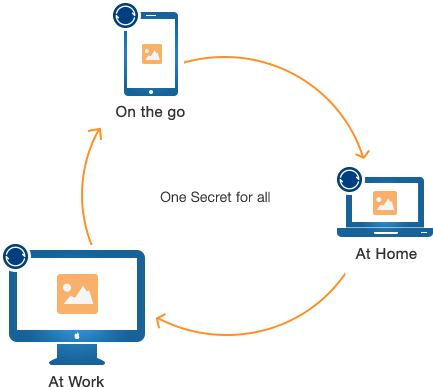
The problem: Your data isn’t safe in the cloud
On a daily basis, many people are constantly backing up files on their personal Dropbox drive. While there’s really nothing wrong with this, what would happen if Dropbox were to get hacked? I’m sure nobody saw it coming when PlayStation Network got hacked, yet, around 77 million people had their personal information stolen. What would happen if that same thing happened to Dropbox, where millions of people store sensitive data?
Sure this is probably an extreme case, but one that hits closer to home would be the recent unveiling of project PRISM. Do you really want the National Security Agency (NSA) to have access to your data? Of course there’s still risk of your own personal servers getting hacked or monitored by the NSA, but a data archiving company such as Dropbox would be a higher target than John Smith’s personal file server. The solution: BitTorrent Sync on your own server
Recently, the folks at BitTorrent created BitTorrent Sync. This service lives on all your machines and can keep whatever folders you select in sync. Even more amazingly, you can have a folder shared on as many (or few) devices as you want! Being a Peer-To-Peer protocol, there’s no need for a remote server. So, it can live in your local area network and never reach out to external servers!
There is however one drawback to this method of file syncing. If your home computers (which are running BitTorrent Sync) are turned off, you won’t be able to download your files on the go using your iPhone or Android device. You’ll have similar results if you’re on the go and your home network just happens to go down.
The solution to this problem is to create a remote “Dropbox” like service, housed on your own server! Unfortunately, this method will not be free, but it’s still cheaper than paying a cloud service. Plus it’ll be much more reliable for keeping your devices always in sync. To start off, you need to buy a server to host your files on (if you don’t own one already). This guide will be for Linux based servers (I’m using Ubuntu). I highly recommend DigitalOcean as a host. They use SSD and are extremely reasonably priced. Did I mention they’re blazing fast too? Okay, enough of the sales pitch.
Once you have your server ready to go, I recommend taking a few moments to configure your server’s security. There’s a quick and painless guide on securing a Ubuntu server here.
Once your server is secured, install BitTorrent Sync!
We’ll need to know whether our system is 32 or 64 bit. If you’re not sure which to install, SSH into your server and run file /sbin/init.
If the output contains 32-bit
Then SSH into your server and run:
curl -L http://download-lb.utorrent.com/endpoint/btsync/os/linux-i386/track/stable > btsync.tarIf the output contains 64-bit
Then SSH into your server and run:
curl -L http://download-lb.utorrent.com/endpoint/btsync/os/linux-x64/track/stable > btsync.tarNow let’s go ahead and extract the files from the tar by running
tar -xvf btsync.tarThis should leave you with two files: btsync and LICENSE.TXT. You can go ahead and remove the license file if you’d like (sudo rm LICENSE.TXT). To keep things clean, I’m going to place the btsync executable in /BTSync/ and put the folders I want to sync inside /BTSync/folders/.
To create this file structure, just run
sudo mkdir -p /BTSync/folders/which will create both directories. Then we can move the btsync executable to the folder by running
sudo mv btsync /BTSync/Next, we’re going to make the btsync process auto-start when our server boots. So run
sudo nano /etc/rc.localand add in /BTSync/btsync on any line before exit 0.
At this point we’re almost done! You can startup BTSync by running
sudo /BTSync/btsyncOnce it starts running, navigate to http://yourserver:8888. After creating your username and password, you can begin adding your BitTorrent Sync folders!
A BitTorrent Sync guide for newcomers
If I left you a little confused after the last section, no worries! I’m here to hold your hand and guide you through the wonderful world of BitTorrent Sync! If you haven’t already, download and install BitTorrent Sync on your local computer. Once you launch the program, you’ll see a window where you can add in folders to sync. It will look like this, only blank

Click the + button in the bottom left to add a new folder to sync.
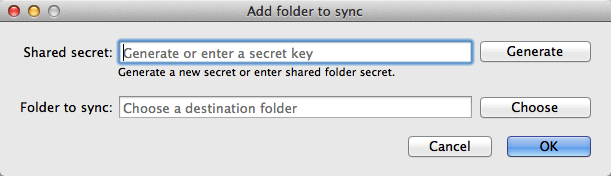
You’re going to want to generate a new shared secret and then choose the folder you want to sync to your server. In this example, I’m going to sync a folder for a project I’m working on.
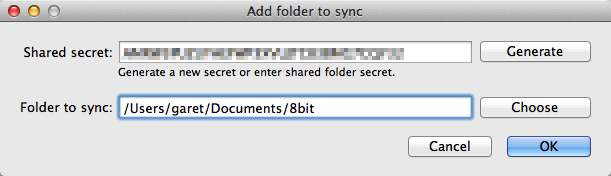
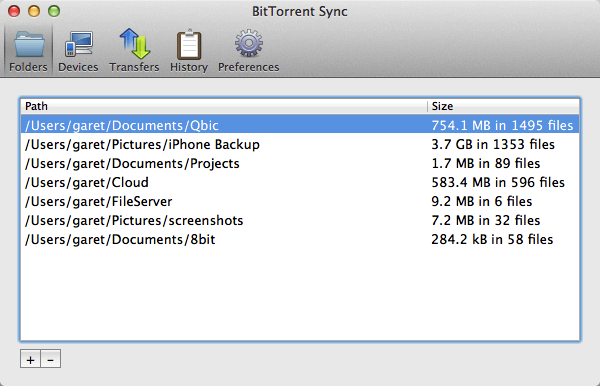
Once the folder is added, it’ll show up inside your folder list.
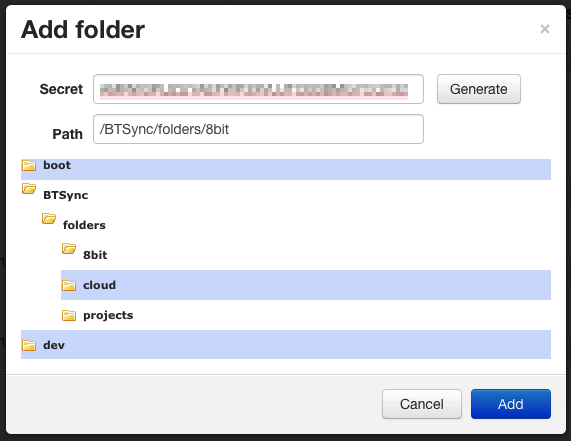
Now right-click on the folder from this list and choose “Copy Secret”. Before we can add this to our server, we need to create the folder it’ll sync to! So SSH into your server and run
sudo mkdir /BTSync/folders/my-folder-name/At this point we’re going to navigate back to our server’s BTSync interface, which is located at http://yourserver:8888 and click the Add Folder button. Paste in the secret you copied and select the folder you just created.
It’ll immediately add the folder and start syncing with your computer. Congratulations, you’ve now created a remote cloud that syncs with your home computer! You can now add this folder on any computer or mobile phone by downloading the app and using the secret key!
Set up a public folder
People love that you can just drag and drop a file into your Dropbox’s public folder to quickly share files with friends, family, or colleagues. Before continuing, I recommend setting up a public domain that you can access the server from. There’s a good guide for setting that up here.
Once you have that setup, we’re going to add a folder just like before! Only now, from the BitTorrent Sync web interface, you’re going to select a directory that’s located inside your public_html folder! Now when you add files into your local directory, your friends can download them by going to http://yourdomain.com/public_sync_folder/file.zip
Closing thoughts
So now I’m at the boring end-segment of my guide. I hope you guys learned something from this guide, and I hope that you enjoy your brand new private Dropbox service!